They say that its foundation should be strong and crack-free for a building to stand sky high. But it is not as easy as it sounds. The foundation is one of the most depreciation-prone areas with all sorts of issues that happen now and then. One of the most common issues that occur with foundations is the cracks. Their appearance is small, but repairing these small issues takes time and adds to the maintenance and repair expenditure.
It is sadder when such things happen in a freshly constructed building or with anyone who moves into their new house with zeal and excitement. The need for a foundation repair Kalamazoo mi is common, and the best solution for the people is to visit this site and have an idea about all the essentials of such a repair.
Here are 8 ways that act their best on such cracks and save people from extra expenditures and other added problems.
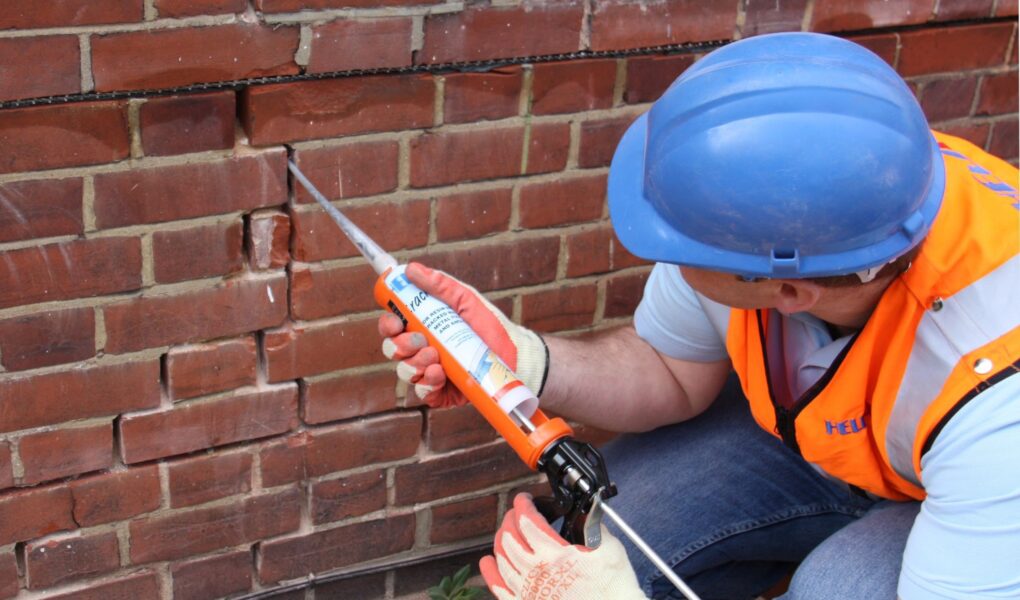
1. Using An Epoxy For Cracks
Epoxy is one of the most reliable substances when anyone plans to repair the cracks that happen to occur in the building and house foundations. It offers excellent properties that are perfect for solving cracked surfaces. The properties are as follows:
- It offers great resistance to chemicals and heat. They function their best in alkaline areas.
- It acts as an adhesive to different kinds of substrates.
- It can be compressed and has high tensile strength.
- The shrinkage issue is not a problem while curing.
- The insulation degree is high, followed by praise-worthy retention properties.
Also, while using epoxy, there are some things that people should cater to that are discussed as follows:
- The surface crack needs to be dry. The epoxy won’t perform its best on wet bases.
- It is better to use electronics like blow-dryers to prevent issues during the repair. Dampness will create long-term quality issues.
- The potential repair of repair should be clean to ensure no extra material that might harm the repair quality. A wire brush is the best way to use ensure the cleaning.
2. Port Blockage
Blocking the ports is essential. It ensures that nothing extra enters or comes out of the crack. Port blockage is possible with the help of finishing nails. Finishing nails are usually a byproduct of iron. They can be placed partway into the crack. The person repairing the surface crack should keep an appropriate distance between two nails. Also, the nails have their applications that extend to the alignment of ports during the repair.
3. Sealer Mixing
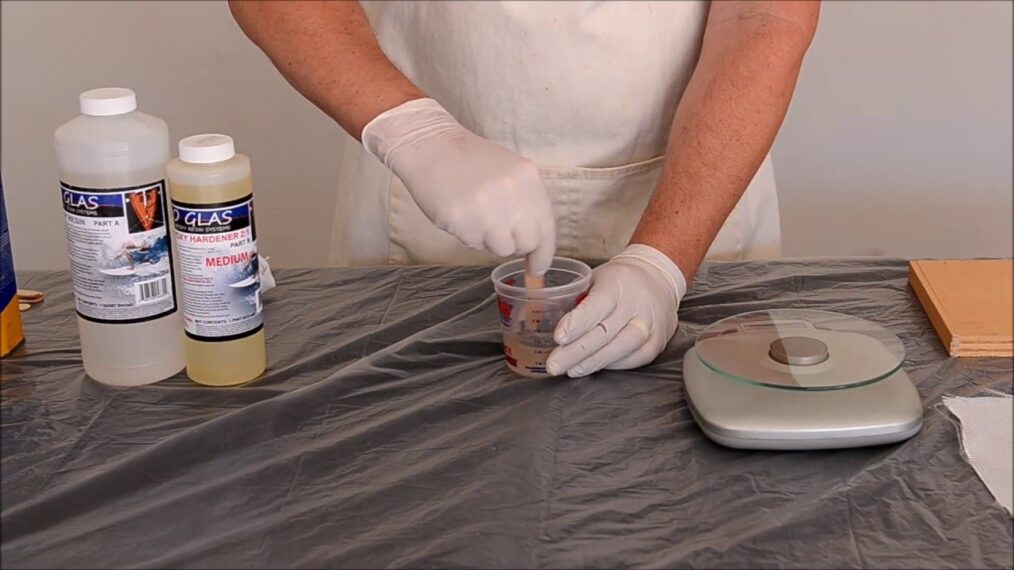
Epoxy separation is important during a repair, and hence, it should be mixed properly. The technique is to take two containers and pour equal amounts of epoxy into them. Name the containers as 1 and 2 or A and B to avoid confusion. Also, the person can use straws or ice cream sticks to mix the epoxy and avoid any chances of contaminating the mixtures. Small portions can be placed on flat bases like paint trays or a simple cardboard tray for better mixing.
4. Port Attachment
Now comes the main step. It includes pouring some sealer near the crack. Don’t forget to cover the area where the iron nail is placed. Be careful and concentrate while pouring the epoxy; otherwise, it can enter the hole created by the iron nail. It will undo everything done by now, and the person repairing the crack will have to start it all over again. Plastic ports can be used for this purpose. Once the person repairing the surface pours the epoxy, the iron nail can be covered using a plastic port. Make sure to press it into the wall to not come off on its own. Repeat the process with all the nails that have been fixed into the middle of the cracks. When dealing with different types of ceiling cracks in your home, it’s essential to address the underlying issue promptly. However, it’s equally important to recognize that sealing foundation cracks is crucial to maintaining the integrity of your building’s structure.
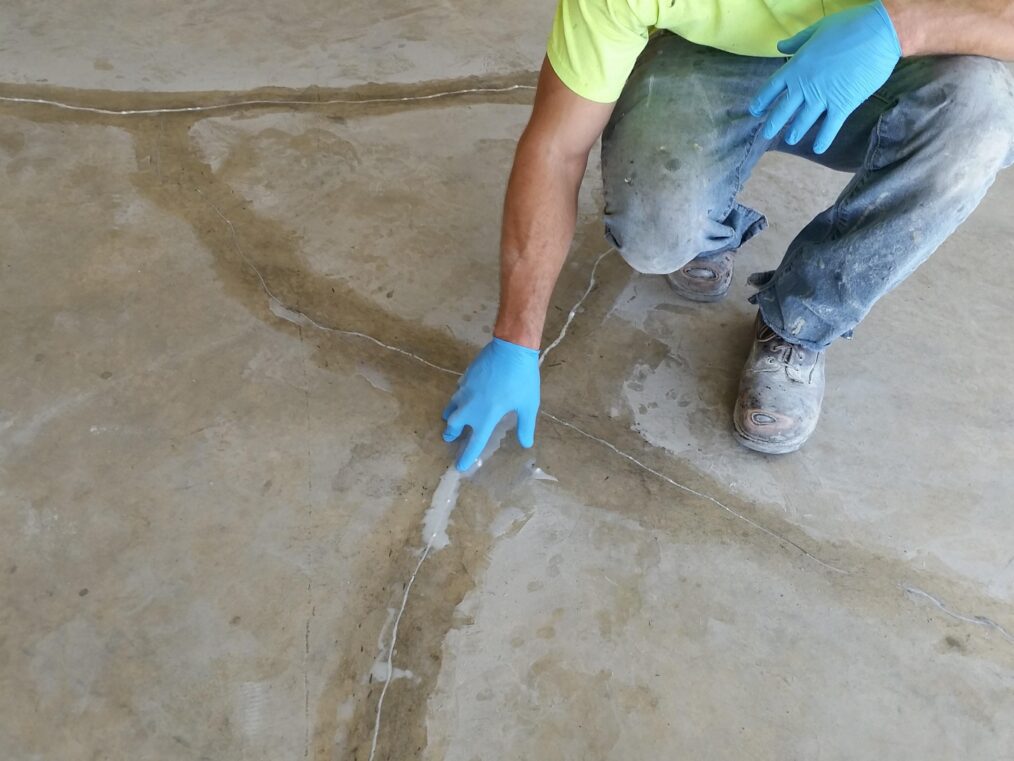
5. Spreading The Mix To Cover The Cracks
If the surface crack is continuous and long, the best way of repairing it is by using a bigger scoop of epoxy and applying the same to the crack in parts using a knife or trowel. It is better to secure the same with the help of the plastic ports that are used in the previous steps. The person repairing the cracks need not worry about leaving some portions behind. The extended neck portions of the crack should be left unaddressed as the epoxy will move inside it and automatically solve the purpose.
6. Injecting The Mixture Into The Cracks
There’s one thing that the repairer needs to check – whether he has access to the surface crack through some basement or inner pathway. In such a case, the crack might be going clean. If it does, then it is better to use epoxy there. An absence of this will create major issues like deeper cracks that might also harm the person walking over them. Ensure to target the lowest port around the nail and inject the epoxy to reach the bottom without flowing in the outward direction.
7. Sealing It In The Right Way

Injecting the epoxy and filling the port will not mark it at the end of the process. It is important to seal the cracks, especially where epoxy has been injected in bulk. In such areas, use a plastic port and move on to the next one. Don’t leave any place or nail unaddressed.
8. Removing The Ports
Now is when the person seeking to repair the crack can sit back, relax, and wait for the epoxy to dry. It can take up to 4 days for the same. Sometimes, the drying process can take 4-5 days, which is not an issue. Use a cutter or a hacksaw to cut the plastic ports. The base shall remain pasted to the surface, and the upper shall be cut. It is the person’s discretion to cover the plastic base or let it be as it is. None of the situations can cause harm to the floor.
Conclusion
Repairing the foundation cracks is no rocket science. The only hard nut to crack in such cases is to follow the steps with care and precautions. Small mistakes can lead to bigger problems. So, avoid that. In all, the steps are simple. Try it out for a smooth and crack-free surface.